Followers

Friday, April 13, 2012

Cricut Old West Birthday Invitations


Hello from Texas! 

This is Billie, from Billie’s Scrappetique here with my very first project for Scrapbook Pal!  I’m so honored to be a part of this amazing team and to be working with such an awesome group of ladies!  :-)

This is an invitation I created for my daughter’s birthday party.  I cut the horse and the fence from Cricut Old West cartridge.  I used the “wanted poster” for the invitation information inside, but silly me!  I didn’t take a pic before I wrote in all of the invitations (person info, ya know?).  I’ll try to be better next time!  *sigh*

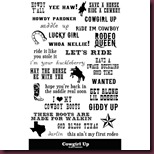
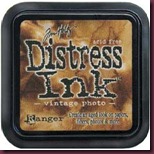
I used Ranger Vintage Photo to ink the edges of the papers, horse, etc.  I adhered the pink polka dot paper to the card using my Scotch ATG, which I love, love, love (thanks, Mom!)!  I used Ranger Star Dust Stickles around the edges of the “Let’s Ride” banner.  Speaking of “Let’s Ride”, do you see that cute sentiment stamp?  That’s from the Pink By Design Cowgirl Up stamp set!  That set has a LOT of cute sentiments that I’ll be using again and again! 

I used Glossy Accents to piece the horse together, as well as to adhere the horse to that adorable pink polka dot paper!  I used Pop Dots to attach the fence and the banner.  I added a piece of pink ribbon to the horse’s mane and finished off the card with a piece of twine.  My daughter’s reaction?  She loved them!  She’s 8, so she’s still young enough to love me to pieces and think everything I do is wonderful.  It sure would be nice if that lasted forever!  ;-)

Here are the items I used on this project, with links to the items in the Scrapbook Pal store!  You haven’t shopped at Scrapbook Pal before?  Say what?!  Oh, my!  We must remedy that!  Go ahead…click a picture to be taken to that item on the Scrapbook Pal website! They have great prices AND free shipping over $25!  You can’t beat that!!!  OH!  And they ship FAST!!!  I placed an order yesterday.  It was on it’s way to me in yesterday’s mail!  :-)

ATG Cowgirl Up Star Dust SticklesRanger Vintage PhotoGlossy Accents Old West  

Thanks for stopping by today!  I hope you’ll stop by again soon……….I’ve got the matching banner to show you!  :-)

Until next time……

Billie’s Scrappetique 

Pin It!

Monday, April 02, 2012

Shape it up!!


Hey Y’all! 

This month’s challenge at Scrappy Frogs is “Shape it up”.  What does that mean?  Well, it’s simple!  Instead of the usual square or rectangle card, make a shape card – circle, oval, octagon, heart, etc!  Need an idea?  Use a Spellbinders die, Cricut cartridge, Sizzix die, etc to make a card. 

I created this super simple dress card for a friend who recently had a precious baby girl…………almost 7 weeks early and weighing in at only 4 1/2 lbs!!  Mom & baby both seem to be doing great, other than baby will likely be in NICU for a few weeks. 

For this project, I cut 5 layers of paper, using a doll dress SVG file, inked the edges, added a ribbon and bow, a little Star Dust Stickles, stamped a sentiment and adhered it all together. 

So……………there ya have it!  I’m looking forward to seeing what kind of awesome projects you create for our Scrappy Frogs Shape it Up challenge!  :-)

More soon……..

{hugs}

Billie’s Scrappetique

Pin It!

Wednesday, March 28, 2012

Baby Banner


hello friends!!

It’s been a while since I’ve posted anything on here and while I do have several things scheduled for the coming weeks, I wanted to share a little something I made for a friend’s baby shower.  Her baby shower was scheduled for March 25, but ‘baby’ decided to make a grand entrance and arrive almost 7 weeks early!  We still had the baby shower, mom was able to attend, but baby was still in the hospital in NICU, where she will probably be for the next few weeks.  At any rate, everyone is doing great and that’s the most important part, right?  :-)

Anyway, this is a banner I made for the baby’s room (should the mom decide to hang it).  I’m pleased with the way this turn out and given the feedback from the shower attendees, I think they liked it too.  *blush*


I hope you’re enjoying gorgeous spring weather, wherever you are!  :-)

Thanks for stopping by and checking out my baby banner.  I hope you’ll stop back by to check out my upcoming projects!

{hugs}

Billie’s Scrappetique

Pin It!

Monday, March 05, 2012

I’m Seeing Spots


Okay, I’m not literally seeing spots!  Our challenge with Scrappy Frogs is “Seeing Spots”.  :-)

Here is what I’ve made for this challenge.  Isn’t this little boy just the cutest??  The boy, bunny and sentiment are all in the Stampin Up set called “Heaven Blessed”, along with another bunny, some chicks and another sentiment.  It’s in the Occasions Mini. 


Here is an angled view of the card I made.  I finished off the inside, inked edges, etc.  I also embossed all of the stamped areas with a brown embossing powder. 

I hope you’ll stop by the Scrappy Frogs challenge blog to see what the rest of the Design Team has made and enter your “Seeing Spots” project. 

Not sure what to include that has spots?  Here are a few ideas for you:

  • ladybug
  • cheetah
  • polka dot paper
  • polka dot background stamp
  • polka dot ribbon

That’s not meant to be all-inclusive!  Just tossing out some ideas!  :-)

Have a great week!

{Hugs}

Billie’s Scrappetique

PS – If you’re local, or know someone who is, be sure to check out my Upcoming Classes page to see what’s on the calendar.  There’s talk of adding Cricut classes, crops, JustRite and Spellbinders classes, etc.  If you have an idea for other classes to add, shoot me an email.  :-)

Pin It!

Sunday, February 12, 2012

Valentine’s Gift Bag


Hi Again!!

I’m back with the gift bag I didn’t have photos of yesterday….so sorry about that!! 

This is the gift sack I made for my daughter’s teacher.  As you can see, it’s another super simple project, but I think it turned out really cute!  :-)

Here are shots of a few different angles of the bag. 


Here’s a straight on shot of the bag.  I started with a plain white paper lunch sack and cut about 1/4” off the top to get rid of the jagged edges of the bag.  I punched the top of the bag (while still in the folded position) to get the heart border.  When I did this, I had NO IDEA how it would look on the finished project, but it turned out great!  The punch works perfectly with this bag and makes a cute decorative edge for the bag with very minimal work involved!  ;-)

I used the Doodlecharms Cricut Cartridge to create the hearts.  I cut the black scalloped and white hearts at 1.75” on the border feature.  I used the same Worn Lipstick Distress Ink and inked the edges of the bag and the white hearts.  I stamped “Happy Valentine’s Day” using the SSD Label Accents and Black Soot Distress Ink.

Thanks for stopping by!  See ya again soon……

{hugs}

Billie’s Scrappetique

Pin It!