Followers

Monday, September 03, 2012

Back to school…


Hi! 

I sure hope your first week of school has gone smoothly and that your children love their teacher(s)!  :-)

So, for today’s project, I have joined in on a challenge with cut files from My Scrap Chick.  The challenge was to create a card using the Card Essentials Vol 2 collection.  This project is also my card for the Scrappy Frogs DT, which is “Back To School”. 

I created this card for my oldest daughter, who is a big SENIOR this year!  I’m not sure what to think about that!  I’m happy for her, but very sad for me that she’s almost grown……  :-/

Thanks for stopping by today! 

{hugs}

Billie

Pin It!

Tuesday, August 28, 2012

Cricut Imagine card


Hello!!

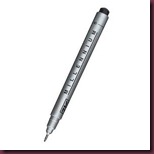
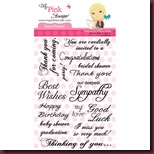
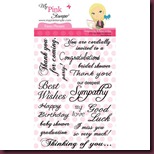
Here is a super simple Cricut Imagine birthday card.  I printed the kite and sky layers with my Cricut Imagine, added some faux stitching with my black Millennium Pen, added the Happy Birthday sentiment, inked it with Spiced Marmalade and adhered it with Glossy Accents. 

2012-07-19_16-07-47_97

For this project (click photos for direct link to products):

image 42-05002__31332_zoom  Millenium Pen Pink Stamper Fancy Phrases Glossy Accents

Thanks for stopping by today!  :-)

{hugs}

Billie

Pin It!

Monday, August 13, 2012

Graphic 45 Birthday


G’day!

I’m here today with a “Happy Birthday” card using several amazing products from Scrapbook Pal.  I’ve had this cartridge since November and I think this is the first time I’ve used it!  Sadly, I have several cartridges like that, but I hope to change all that in the coming months!  I’m totally loving this Forever Young Cricut cartridge, so I suspect you’ll be seeing more projects from this cartridge!!  ;-)

2012-07-19_16-07-19_107

This card came together so easily, and while not my typical “clean & simple” style, I absolutely love the finished card!  Hey, even my 17-year-old who is critical of EVERYTHING liked it!  Now THAT is impressive!  LOL

Products used (click photo to be taken directly to product):


42-05002__31332_zoom Labels Four

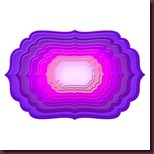
 Walnut Stain Spellbinders Rectangles Small

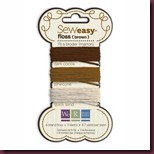
 Spellbinders Scallop Rectangles Small Sew Easy Floss Brown 

Pink Stamper Fancy Phrases 

Glossy Accents

As always………………….thanks for stopping by today!!

{hugs}

Billie

Pin It!

Saturday, July 28, 2012

Family Wall Hanging


Hi there!

Billie here with a family wall hanging for the Scrapbook Pal Design Team. 

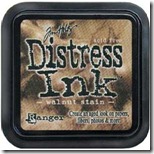
I created this project using chipboard, Spellbinders Label Four die set, Basic Grey papers, twine, Walnut Stain Distress Ink, etc.  The letters and numbers were part of the BG paper collection.  The flourishes are an old Spellbinders die, which I inked with Coffee Shop Glimmer Mist. 


DSC01508

Are you interested in purchasing some of these awesome products?  If so, click the photos below to be taken to these products at Scrapbook Pal.  Their prices are great and you get FREE SHIPPING over $25! 

Labels Four Walnut Stain Glossy Accents Chipboard Coffee Shop Glimmer Mist

I hope you’ll stop back by again soon.  :-)

{hugs}

Billie

Pin It!

Friday, July 13, 2012

From My Kitchen to Yours…


Hi Blogger Friends!

Billie here with a project for the Scrapbook Pal Design Team. 

Sadly, dinner is one of those things in my household that I don’t really think about until it’s time to cook.  That doesn’t mean my family goes hungry or that we don’t have meals on the table.  It just means I get a lot of “what’s for dinner” questions!  So, I’ve created a weekly menu board to {hopefully} keep from having to figure out last-minute meals, cut back on the grocery budget and keep my family from having to ask “what’s for dinner”!  It’s a win/win for everyone!  :-)

DSC01513

I have had this frame hanging around for a while, so it seemed the perfect candidate for our menu board. 

The paper I used is from The Paper Studio and is called Sugar & Spice.  It’s a super cute stack with embossing and glitter on most pages!! 

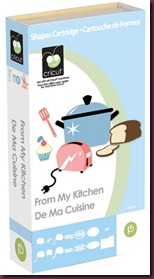
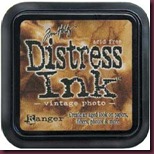
I cut the recipe cards with tabs on my Cricut in white paper, which my oldest daughter inked with Vintage Photo, while I cut the matching tabs in some of the more solid papers in the stack.  I stamped the days of the week from an old Close To My Heart stamp set.  After everything was inked and glued together, I laminated my cards with my YourStory machine.  My intention is to write on my recipe cards with a dry erase marker so I can reuse my inserts. 

I covered a binder clip with cut heart print, glittery paper, which was also included in the stack.  I created the note pad with some regular copy paper and added a piece of chipboard on the back side to hold it in place.

How CUTE is that apron?!  I just adore it!!

I’ve used the following products on my project.  Click the photo of the product you’re interested in and it will take you to that item at Scrapbook Pal. 

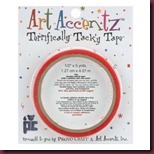
42-05002__31332_zoom Chipboard From My Kitchen Glossy Accents Ranger Vintage Photo Terrifically Tacky Tape

Thanks for stopping by today!  I hope you’ll stop back by again soon!  :-)

{hugs}

Billie

Pin It!